
尽管 AnimatedVectorDrawableCompat(自从 2016 年二月份 – Support Library 23.2.0)已经出来有一段时间了,Google 官方却一直没有提供一份使用教程。你很难搜到相关可靠的文章,也没有什么能把这个东西完完整整的呈现出来。
所以接下来我尝试将所有必要知识精简成你所能理解的东西。
你需要做的事:
1.在你的 build.gradle 文件中添加 AppCompat 依赖
compile 'com.android.support:appcompat-v7:25.0.0'- 我使用了(此时)最新版本
25.0.0,但是只要从23.2.0开始任何版本可以正常工作
2.创建vector drawable(矢量图)文件
- 它能被赋予动画效果
vectordrawable文件必须被放在你项目的 res/drawable 文件夹- 更多的相关内容点这里(译注:官方文档需科学上网)
上面的代码描绘的是一个基础的黑色菜单(汉堡包)图标:<?xml version="1.0" encoding="utf-8"?> <vector xmlns:android="http://schemas.android.com/apk/res/android" android:width="24dp" android:height="24dp" android:viewportHeight="24" android:viewportWidth="24"> <group android:name="menu" android:pivotX="12" android:pivotY="12"> <group android:name="bottom_container" android:pivotX="20" android:pivotY="17"> <path android:name="bottom" android:pathData="M4,17,L20,17" android:strokeColor="#000" android:strokeLineCap="square" android:strokeLineJoin="miter" android:strokeMiterLimit="10" android:strokeWidth="2"/> </group> <group android:name="stem_container" android:pivotX="12" android:pivotY="12"> <path android:name="stem" android:pathData="M4,12,L20,12" android:strokeColor="#000" android:strokeLineCap="square" android:strokeLineJoin="miter" android:strokeMiterLimit="10" android:strokeWidth="2"/> </group> <group android:name="top_container" android:pivotX="20" android:pivotY="7"> <path android:name="top" android:pathData="M4,7,L20,7" android:strokeColor="#000" android:strokeLineCap="square" android:strokeLineJoin="miter" android:strokeMiterLimit="10" android:strokeWidth="2"/> </group> </group> </vector>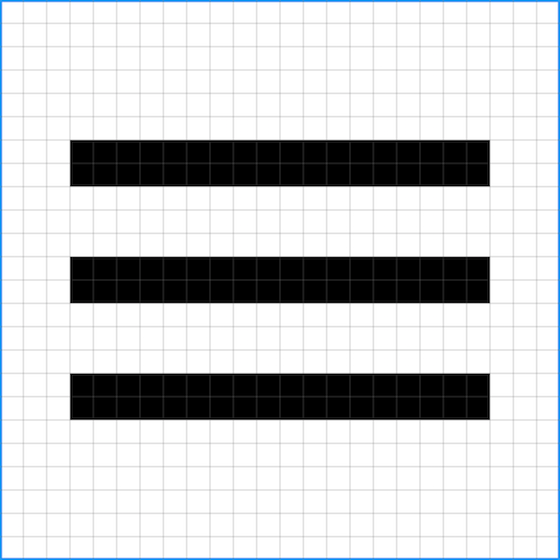
3.创建动画文件
- 它们指定了
vector的动画部分 - 可以将多个动画分别指定给一个
vectordrawable 的不同的部分 vector不同的部分用name标签指定(例如menu,bottom_container,bottom,stem_container,stem,top_container,top)- 动画文件根元素既可以是
set也可以是objectAnimator - 这些文件需要放在res/anim目录下
接下来的代码展现了 top_container 动画,它定义了四个属性,translateX,translateY,scaleX 以及 rotation:
<?xml version="1.0" encoding="utf-8"?>
<set xmlns:android="http://schemas.android.com/apk/res/android">
    <objectAnimator
        android:name="top_container"
        android:duration="700"
        android:interpolator="@android:anim/accelerate_decelerate_interpolator"
        android:propertyName="translateX"
        android:startOffset="500"
        android:valueFrom="0"
        android:valueTo="-1.41421356"
        android:valueType="floatType"/>
    <objectAnimator
        android:name="top_container"
        android:duration="700"
        android:interpolator="@android:anim/accelerate_decelerate_interpolator"
        android:propertyName="translateY"
        android:startOffset="500"
        android:valueFrom="0"
        android:valueTo="5"
        android:valueType="floatType"/>
    <objectAnimator
        android:name="top_container"
        android:duration="700"
        android:interpolator="@android:anim/accelerate_decelerate_interpolator"
        android:propertyName="scaleX"
        android:startOffset="500"
        android:valueFrom="1"
        android:valueTo="0.5"
        android:valueType="floatType"/>
    <objectAnimator
        android:name="top_container"
        android:duration="700"
        android:interpolator="@android:anim/accelerate_decelerate_interpolator"
        android:propertyName="rotation"
        android:startOffset="500"
        android:valueFrom="0"
        android:valueTo="45"
        android:valueType="floatType"/>
</set>
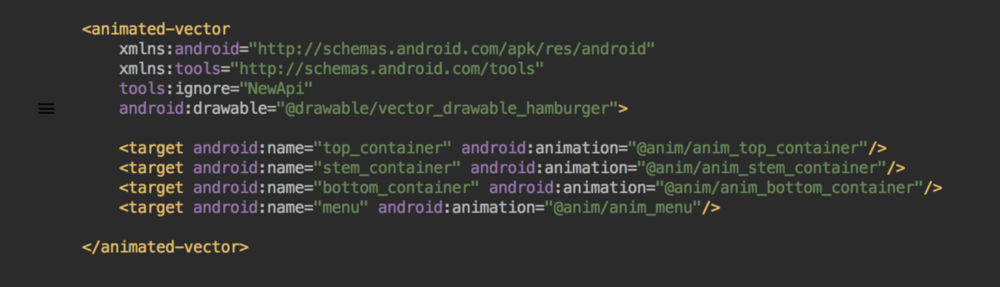
4.创建animate-vector drawable文件
animated-vector将所有的内容都联系在一起(vectordrawable 文件和所有的animation文件)- 需要将它放在你项目的 res/anim 目录下
<?xml version="1.0" encoding="utf-8"?>
<animated-vector
    xmlns:android="http://schemas.android.com/apk/res/android"
    xmlns:tools="http://schemas.android.com/tools"
    android:drawable="@drawable/vector_menu_back"
    tools:ignore="NewApi">

    <target
        android:name="top_container"
        android:animation="@anim/anim_top_container"/>
    <target
        android:name="stem_container"
        android:animation="@anim/anim_stem_container"/>
    <target
        android:name="bottom_container"
        android:animation="@anim/anim_bottom_container"/>
    <target
        android:name="menu"
        android:animation="@anim/anim_menu"/>

</animated-vector>
需要注意的是:
如果你的
minSdkVersion小于21(如果大于的话,那我真的不知道你为什么会考虑用AnimatedVectorDrawableCompat…正常用AnimatedVectorDrawable就行了),Android Studio 可能会在你的animated-vector文件中弹出一个静态检查警告:
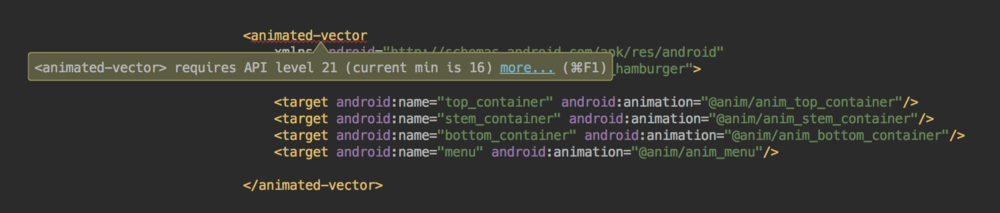
不要担心这个警告!如果你的代码没有错误,你的
AnimatedVectorDrawableCompat会忽略掉它并且能够正常工作。当然如果你不想再看到警告,可以添加tools:ignore="NewApi":
5.编辑你的 build.gradle 文件
- 在你的
build.gradle文件中,将vectorDrawables.useSupportLibrary = true添加进android部分的defaultConfig内 - 你需要这行代码,这样你的
animated-vector才能兼容API小于 Lollipop版本的系统
android {
    compileSdkVersion 24
    buildToolsVersion "24.0.3"
    defaultConfig {
        applicationId "com.junyuan.wukongnew"
        minSdkVersion 21
        targetSdkVersion 24
        versionCode 1
        versionName "1.0"
        vectorDrawables.useSupportLibrary = true
    }
	...
}
6.将你的 AnimatedVectorDrawableCompat 设置到 ImageView 或者 ImageButton
- 你可以用
app:srcCompat把它添加进xml文件
<ImageView
        android:id="@+id/iv_animated"
        android:layout_width="48dp"
        android:layout_height="48dp"
app:srcCompat="@drawable/animated_vector_menu_back"/>- 或者通过 java 代码:
final AnimatedVectorDrawableCompat avd = AnimatedVectorDrawableCompat.create(this, R.drawable.animated_vector_menu_back);
        animatedIv.setImageDrawable(avd);
7.在你需要的时候开启动画
- 获得
AnimatedVectorDrawableCompat的引用(或者是它的一个实现类–Animatable),如果你的AnimatedVectorDrawableCompat是通过 java 代码添加的,可以直接使用这个对象的引用(你可以跳过这步):
final Animatable animatable = (Animatable) animatedIv.getDrawable();- 开启动画
animatable.start()
好消息和坏消息
让我们先来听听好消息:
你可以很轻松通过Roman Nurik的AndroidIconAnimator这个工具(尽管当前它是预览版,但是也足够有用了)实现步骤 1-3。它可以将 svg 文件和你所指定的动画元素转换成 animated-vector drawable 文件
有一件很有意思的事情是导出来的来的 animated-vector 文件使用了 aapt 工具的一些非常厉害的功能,导出来的 drawable 文件包含了全部动画所需的代码(包括 vector drawable 和 animation 文件)。就是将步骤 1-3 的所有文件都包含在一个文件里。
坏消息来了:
AnimatedVectorDrawableCompat 在 API 小于 21 时有一些限制:
Chris Banes的文章中指出:
animate vectors 在 API 小于 21 的平台上工作时同样有一些限制,当前在这些平台上有一下这几点限制:
路径绘制(PathType evaluator),这被用来从一个路径绘制到另一个路径
路径插值器,这被用来定义一个灵活的插值器(展现成一个路径)以代替系统自动生成的,比如说线性插值器(LinearInterpolator)
按路径移动,这很少能用到,几何图形能在限制路径上来回运动
大致意思就是你可以忘了 pathData 元素的动画 pathData,我们只能期望谷歌的天才们能研究一个方法将这个功能兼容到低版本的系统上去。
更多
似乎这里有个小 bug(除非这是它的特点),如果你尝试通过给 animated-vector 添加 startOffset 至你的动画,你的动画将根本不能运行起来(至少它在我这不行),它会从开始状态跳到结束状态(带有一些延迟),在所有的 animated-vector 中至少得有一个动画需要从开始状态运行。这是需要注意的。。。
